Email signatures are generally used to display the sender's name and contact information at the end of an email. Sometimes they are used to give website links or even memorable anecdotes. Regardless of what you wish to make your signature say, it is much easier if this content is automatically added to the end of every email instead of having to add it manually for each email. Below are instructions that teach you how to add your own custom email signature within your RoundCube email client.
- Log into your Webmail dashboard and choose the RoundCube option.
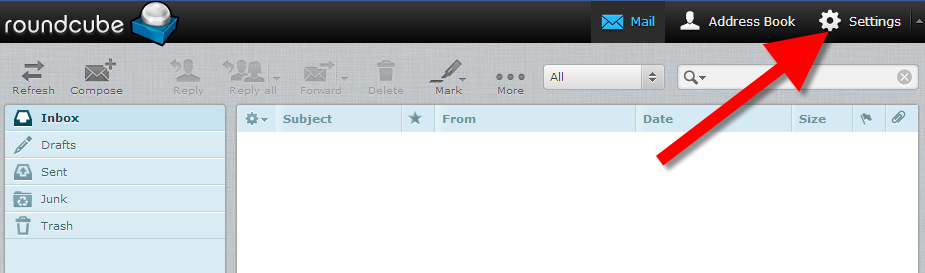
- From the RoundCube dashboard, click on the Settings option in the upper right corner of the screen.
- This brings you to the RoundCube Settings screen. Locate and click on the Identities tab.
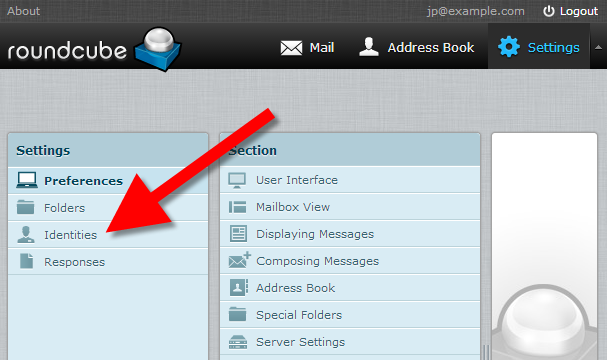
- You are now on the Identities list screen. Find and click on the desired identity in the left hand panel. In this example, there is only one. Clicking on the identity brings up two tabs in the right hand panel. Click on the Signatures tab.
Standard Signature Box: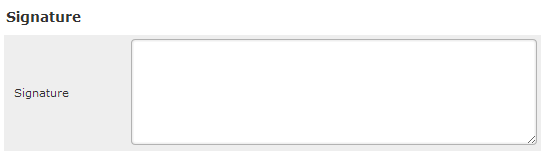
If you wish to use HTML in your signature, simply click the HTML Signature checkbox. This will cause the Signature field to display a textarea, allowing for special formatting.
- Enter your desired custom signature in the Signature field. Once entered, click on the Save button located underneath the tabs.
You have now created your new email signature!
Congratulations, now you know how to create an email signature in Roundcube!